
Making coffee at home can be a real game-changer. Forget those pricey cafe runs that drain your wallet. You can totally make cafe-quality coffee right in your own kitchen. It’s not as hard as you might think, and honestly, it’s way more satisfying. We’ll walk you through the basics, from picking out good beans to using different brewing methods. Get ready to up your coffee game.
Key Takeaways
- Making coffee at home saves money and lets you control exactly how it tastes.
- You need good beans, a decent grinder, and the right brewing gear to start.
- The pour over method offers control for a clean, bright cup.
- French press makes a rich, full-bodied coffee with simple steps.
- Cold brew and Moka pot methods offer smooth, strong coffee options.
Why Make Coffee at Home
Let’s face it, the daily coffee shop run can really add up. If you’re like me, you probably love that morning ritual, but not so much the dent it puts in your wallet. Making coffee at home isn’t just about saving cash, though. It’s about taking control of your cup.
Cost Savings
Think about how much you spend each week on lattes or even just a regular drip coffee. It’s easy to lose track, but when you tally it up, it’s a significant amount. Brewing your own coffee, especially if you buy beans in bulk, can slash those costs dramatically.
Investing in a good grinder is another smart move; you avoid the premium cafes charge for grinding beans right before they brew them for you. Honestly, the savings are pretty impressive once you start. It’s a worthwhile investment for coffee lovers who want to cut down on daily expenses, and owning a quality espresso machine can be a game-changer for your budget. Owning your own espresso coffee machine
Customization Options
This is where home brewing really shines. You’re not limited to the shop’s menu. Want to try beans from a specific region? Go for it. Prefer a lighter or darker roast? You decide. You can play with the grind size, the amount of coffee you use, and how much water you add.
It’s like having your own personal coffee lab. You can experiment with different brewing methods to find what suits your taste best, whether that’s a clean pour-over or a rich French press. You can even add a dash of cinnamon or a splash of vanilla if you’re feeling fancy.
Quality Control
When you make coffee at home, you know exactly what’s going into your mug. You can pick the freshest beans, grind them just before brewing, and use filtered water. This level of control means you can consistently achieve a great-tasting cup, free from any off-flavors that might come from stale beans or poorly maintained equipment at a cafe. Plus, you can keep your own gear clean and calibrated. It’s all about ensuring every sip is as good as the last.
The secret to great coffee at home really boils down to a few key elements: the beans, the grind, the water, and the brew method. Get these right, and you’re well on your way to café-quality coffee without leaving your kitchen.
Essential Tools for Perfect Coffee
Making great coffee at home really comes down to a few key things. You can’t just grab any old beans and expect magic, you know? It’s like trying to bake a cake without flour – it just won’t work out right. So, let’s talk about what you actually need to get started on your journey to café-quality coffee without leaving your kitchen.
Quality Coffee Beans
This is where it all begins. Forget those pre-ground cans that have been sitting on the shelf for ages. You want beans that are recently roasted – look for a “roasted on” date, not just a “best by” date. Single-origin beans from places like Ethiopia or Colombia often have really interesting flavors.
Arabica beans are usually the go-to for a smoother taste, while Robica gives you a stronger kick. Once you get them home, keep them in an airtight container, away from light and heat. Seriously, just a good airtight jar will do wonders.
Grinder Consistency
Okay, so you’ve got good beans. Now you need to grind them. This is super important. If your grounds are all different sizes – some fine, some chunky – your coffee will taste… well, off. It might be bitter or weak.
A burr grinder is way better than a blade grinder because it crushes the beans evenly. You can adjust the grind size depending on how you’re brewing. For a French press, you want it coarse, like sea salt. For pour-over, it’s usually medium-fine, like regular sand. Grinding right before you brew makes a huge difference in freshness.
Here’s a quick look at grind sizes:
| Brewing Method | Grind Size |
|---|---|
| French Press | Coarse |
| Drip Coffee | Medium |
| Pour Over | Medium-Fine |
| Espresso (Moka) | Fine |
Brewing Equipment Choices
Beyond beans and a grinder, you need something to actually make the coffee. There are tons of options, and it can be a bit overwhelming. A simple pour-over cone with filters is a great starting point – it’s cheap and gives you a lot of control.
If you like a richer, bolder cup, a French press is fantastic. For that strong, espresso-like shot without a fancy machine, a Moka pot is a classic choice. Each method has its own charm and produces a slightly different result, so don’t be afraid to try a couple to see what you like best.
The ratio of coffee to water is also a big deal. A good starting point is about 1 gram of coffee for every 16 grams of water. Using a simple kitchen scale can really help you nail this every time, leading to a much more consistent and delicious cup.
Mastering the Pour Over Method
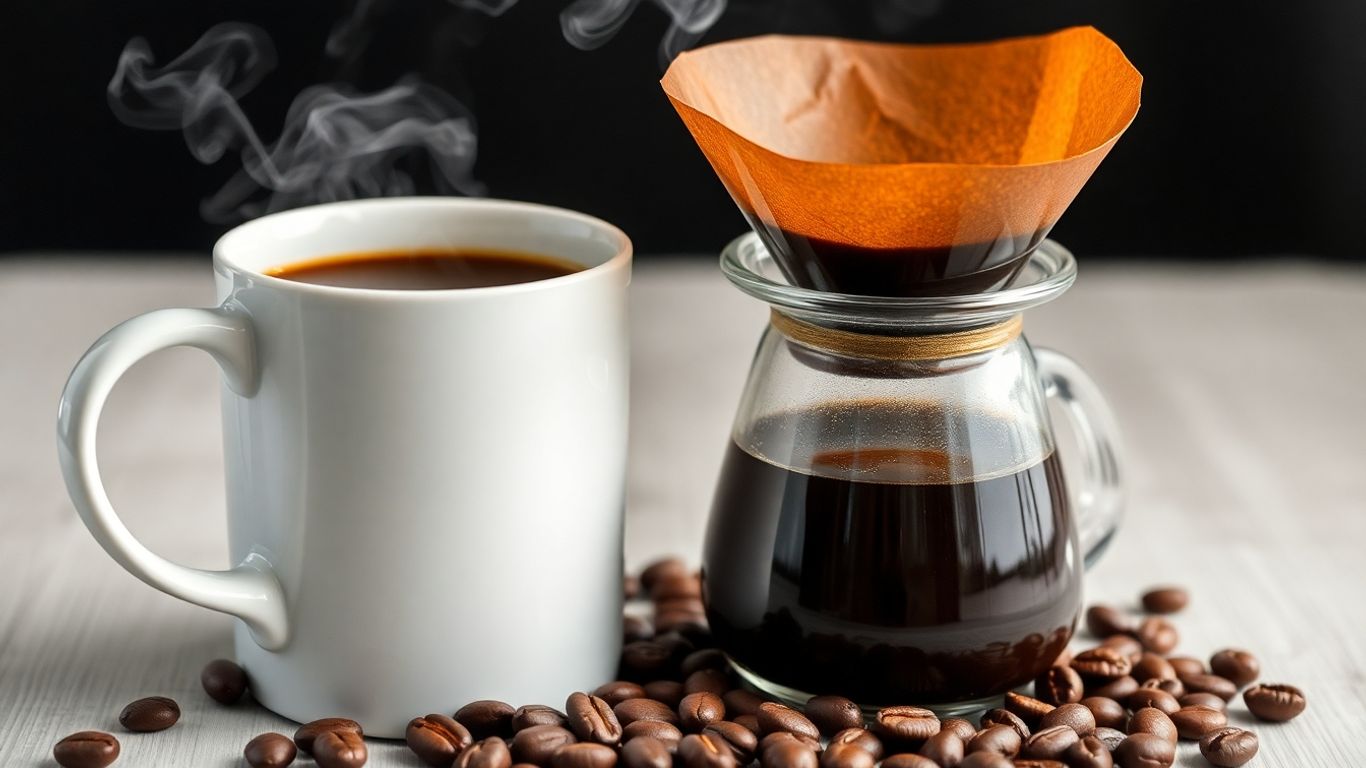
The pour over method is a favorite for many coffee lovers because it gives you a lot of control over how your coffee turns out. It’s a way to really taste the nuances of different beans. It might seem a little fussy at first, but once you get the hang of it, it’s pretty straightforward and makes a really clean, bright cup of coffee.
Pour Over Technique Steps
Making pour over coffee involves a few key steps to get it right. It’s all about the process, so take your time.
- Prep your filter: Place a paper filter into your pour over cone. Rinse it with hot water. This gets rid of any papery taste and also warms up your brewer and mug, which helps keep your coffee hot.
- Add the coffee: Put your ground coffee into the wet filter. Give it a little shake to level the grounds.
- The bloom: Pour just enough hot water over the grounds to wet them all. Wait about 30 seconds. You’ll see the coffee puff up and release gas – this is called the bloom, and it’s important for flavor.
- The main pour: Slowly pour the rest of the hot water over the grounds. Try to pour in a steady, circular motion, starting from the center and moving outwards. Avoid pouring directly onto the filter paper itself.
- Let it drip: Allow all the water to drip through the grounds into your mug or carafe. Once it’s done, remove the filter with the used grounds.
Tips for Perfecting Your Pour
Getting that perfect pour takes a little practice, but these tips will help you get there.
- Use a gooseneck kettle: This type of kettle has a long, thin spout that gives you much better control over the water flow. It makes it easier to pour slowly and evenly.
- Grind size matters: Aim for a medium-fine grind, similar to table salt. If it’s too fine, the water might not flow through properly, and if it’s too coarse, your coffee might taste weak.
- Water temperature is key: The ideal water temperature is between 195°F and 205°F (90°C to 96°C). Water that’s too hot can burn the coffee, and water that’s too cool won’t extract enough flavor.
- Ratio is your friend: A good starting point for the coffee-to-water ratio is 1:15 or 1:16. So, for every gram of coffee, use 15 or 16 grams of water. You can adjust this based on how strong you like your coffee.
The pour over method is a ritual. It’s a moment to slow down and focus on creating something delicious. Don’t get discouraged if your first few attempts aren’t perfect. Each brew is a chance to learn and adjust.
Water Temperature and Ratio
Getting the water temperature and the coffee-to-water ratio right are probably the most important parts of making a great pour over. It’s not complicated, but it does require a little attention to detail.
| Variable | Recommended Range |
|---|---|
| Water Temperature | 195-205°F (90-96°C) |
| Coffee to Water Ratio | 1:15 to 1:17 |
Remember, these are starting points. Feel free to experiment to find what tastes best to you. Some people prefer a slightly stronger brew with a 1:14 ratio, while others like it a bit lighter. The same goes for temperature; a degree or two can make a difference.
The Richness of French Press Coffee
The French press is a classic for a reason. It’s a simple way to get a really full-bodied cup of coffee right at home. Unlike methods that use paper filters, the French press lets all those natural coffee oils make it into your cup. This means a richer flavor and a bit more body, which some people really love. It’s not complicated, but there are a few things to get right to make it taste its best.
French Press Brewing Steps
Making coffee with a French press is pretty straightforward. You don’t need a lot of fancy gear, just the press itself, some coffee, and hot water.
- Heat your water: Aim for water that’s just off the boil, around 195-205°F (90-96°C). Boiling water can scorch the coffee, making it taste bitter.
- Grind your beans: This is important. You want a coarse grind, similar to sea salt. Too fine, and you’ll get sludge in your cup and it’ll be hard to press.
- Add coffee to the press: A good starting point is a ratio of about 1:15 coffee to water. So, for every gram of coffee, use 15 grams of water. If you’re using tablespoons, about 2 tablespoons of coffee per 6 ounces of water is a common measure.
- Pour the water: Pour about half the hot water over the grounds and give it a gentle stir. This helps all the coffee grounds get wet.
- Add the rest of the water: Pour in the remaining water and place the lid on top, but don’t push the plunger down yet.
- Steep: Let it sit for about 4 minutes. This is where the magic happens, letting the coffee and water do their thing.
- Press and pour: Slowly and steadily push the plunger all the way down. Then, pour your coffee right away. Don’t let it sit in the press with the grounds, or it can get bitter.
Achieving the Perfect Brew
Getting that perfect cup from your French press is all about a few key details. It’s not just about throwing coffee and water together.
- Bean Quality: Start with good, fresh coffee beans. The roast level is up to you, but fresher beans always taste better.
- Grind Consistency: As mentioned, a coarse, even grind is key. If your grinder makes fine dust along with coarse bits, you might get a gritty cup.
- Water Temperature: Too hot, and you burn the coffee. Too cool, and you won’t extract enough flavor. That 195-205°F range is pretty reliable.
- Brew Time: Four minutes is a good standard. Shorter might be weak, longer can get bitter. You can play with this a bit to see what you like.
- Ratio: The coffee-to-water ratio really affects the strength. Experiment to find what tastes right for you.
The French press method is great because it keeps the coffee oils in the brew, giving it a fuller mouthfeel and a richer taste compared to methods that filter them out. It’s a simple way to get a robust cup.
Grind Size for French Press
This is probably the most important part of using a French press. If your grind is too fine, you’ll end up with a muddy, over-extracted, and bitter cup of coffee. The grounds will also slip through the metal filter, leaving sediment in your mug. On the other hand, if the grind is too coarse, the water won’t extract enough flavor, resulting in a weak and watery brew. You’re looking for a grind that resembles coarse sea salt or breadcrumbs. Many coffee grinders have specific settings for French press, which is helpful. If yours doesn’t, just aim for the coarsest setting that still produces a somewhat consistent particle size.
Crafting Smooth Cold Brew
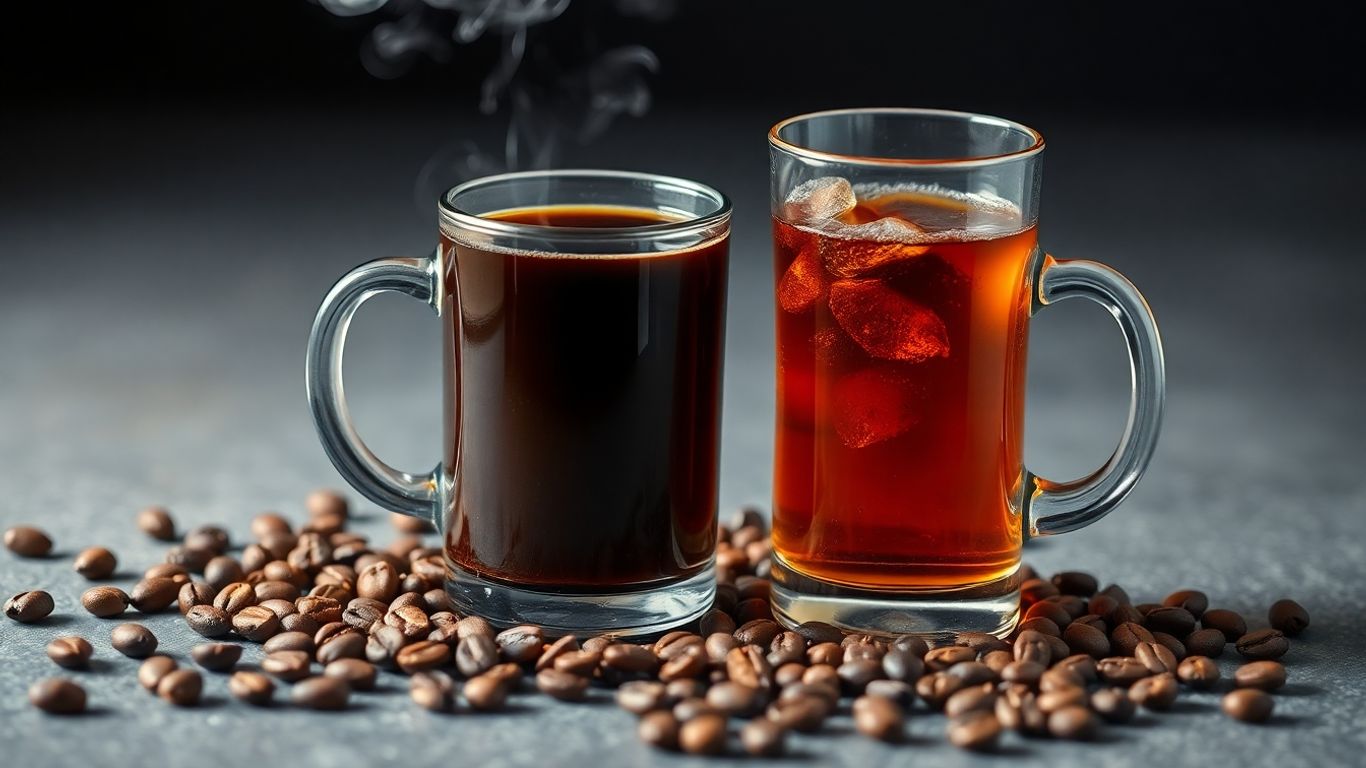
Cold brew coffee is a game-changer if you’re looking for a smoother, less acidic coffee experience. Instead of using hot water, it relies on time and cold water to extract the coffee’s flavor. This results in a naturally sweeter taste and a mellow profile that’s really easy on the stomach. Plus, it’s super simple to make a big batch at home.
Cold Brew Preparation
Making cold brew at home is pretty straightforward. You’ll need coarsely ground coffee beans and cold or room temperature water. The general idea is to combine the two and let them sit for a good while.
Here’s a basic rundown:
- Combine: Put your coarsely ground coffee into a large jar or pitcher. A good starting point for the coffee-to-water ratio is about 1:8, meaning for every part of coffee, use eight parts water. So, if you use a cup of coffee grounds, you’d use eight cups of water.
- Stir: Gently stir the mixture to make sure all the coffee grounds are wet.
- Steep: Cover the container and let it sit. You can leave it on the counter at room temperature or put it in the fridge. The longer it steeps, the stronger it gets.
- Strain: Once it’s steeped, you need to separate the grounds from the liquid. A fine-mesh sieve lined with cheesecloth or a coffee filter works well. You might need to strain it a couple of times to get all the fine particles out.
- Dilute: What you have now is a cold brew concentrate. It’s usually too strong to drink straight, so you’ll want to dilute it with water or milk to your taste. Start with a 1:1 ratio of concentrate to water and adjust from there.
Tips for Optimal Flavor
Getting the best flavor from your cold brew is all about a few key details. It’s not complicated, but paying attention makes a difference.
- Grind Size Matters: Always go for a coarse grind. If the grounds are too fine, they can make the coffee bitter and harder to strain.
- Water Quality: Use filtered water if you can. It really does make a difference in the final taste, just like with any brewing method.
- Patience is Key: Don’t rush the steeping process. The longer it sits, the more flavor it pulls from the beans.
- Freshness: While cold brew is forgiving, using freshly roasted beans will always give you the best results.
The magic of cold brew is in its slow extraction. This process pulls out the coffee’s oils and flavors without the bitterness that can come from hot water. It’s a gentle way to get a rich coffee taste.
Steeping Time and Dilution
Deciding how long to steep your cold brew and how much to dilute it really comes down to personal preference. There’s no single right answer, but here are some guidelines.
- Steeping Time: Most people find that steeping for 12 to 24 hours is the sweet spot. Shorter times might result in a weaker flavor, while much longer might start to extract some less desirable notes. Experimenting within this range is a good idea.
- Dilution Ratio: As mentioned, the concentrate is strong. A common starting point for dilution is a 1:1 ratio of concentrate to water or milk. If that’s still too strong, try 1:2. If it’s too weak, use less water next time or steep for longer. Some people even like to add a splash of cream or their favorite sweetener.
Remember, the goal is to find what tastes best to you. So, don’t be afraid to play around with these numbers until you hit that perfect cup.
Espresso-Style Shots with a Moka Pot
If you’re looking to get that rich, concentrated coffee flavor without a fancy espresso machine, the Moka pot is your friend. This classic Italian stovetop brewer makes a strong, espresso-like coffee that’s perfect for sipping on its own or using as a base for milk drinks. It’s a bit of an art, but once you get the hang of it, you’ll be making cafe-quality shots right on your stove.
Using a Moka Pot Effectively
Getting a good shot from a Moka pot is all about a few key things. First off, the water. You want to fill the bottom chamber up to just below the safety valve. Using water that’s already hot, but not boiling, can help prevent the coffee from getting that burnt taste.
Then comes the coffee grounds. You’ll want to fill the funnel basket with finely ground coffee – think a bit coarser than espresso grind, but finer than drip. Don’t pack it down too hard, just level it off. Assemble the pot, put it on medium heat, and keep the lid open.
You’ll see the coffee start to flow into the top chamber. As soon as it turns a nice honey color and starts to sputter, take it off the heat. Closing the lid and running the base under cool water can stop the brewing process quickly, preventing bitterness. It’s a simple process, but paying attention to these details makes a big difference.
Tips for Moka Pot Espresso
- Grind Size: Aim for a grind that’s finer than drip coffee but not as fine as true espresso. A medium-fine grind is usually best. You can find coffee specifically roasted for Moka pots to get the best results.
- Water Temperature: Start with hot, not boiling, water in the base. This helps avoid overheating the coffee grounds.
- Heat Control: Use medium heat. Too high, and you risk scorching the coffee. Too low, and it takes forever and might not extract properly.
- Don’t Overfill: Make sure the coffee grounds in the filter basket are level but not tamped down hard. Overfilling or tamping too much can create too much pressure.
- Watch the Brew: Keep an eye on the coffee as it brews. Remove the pot from the heat as soon as the stream turns from a dark brown to a lighter, golden color.
Achieving Strong Flavor
To really nail that strong, robust flavor, it’s all about the coffee itself and how you handle the brew. Using freshly roasted beans makes a huge difference. You want a coffee that’s roasted for espresso or a darker roast, as this holds up well to the Moka pot’s brewing method.
The grind consistency is also super important; too fine and it can clog the filter, too coarse and the water just rushes through, leaving you with weak coffee. It’s a balancing act.
The Moka pot works by steam pressure pushing hot water up through coffee grounds. This process creates a concentrated coffee that’s stronger than drip but not quite as intense as true espresso. Getting the right grind and heat is key to avoiding a bitter taste.
Experimenting with the coffee-to-water ratio is also a good idea. While Moka pots have set chambers, you can adjust the amount of coffee grounds slightly to fine-tune the strength. Remember, the goal is a rich, full-bodied cup that’s satisfyingly strong.
Your Perfect Cup Awaits
So there you have it. Making really good coffee at home isn’t some big mystery. You can save money, get exactly the taste you want, and honestly, it’s kind of fun. We went over a few ways to do it, like the pour over for a clean taste, the French press for something richer, cold brew for a smooth kick, and the Moka pot for that espresso vibe.
Remember, it’s all about the beans, the grind, the water, and a little patience. Don’t be afraid to play around with it. Your kitchen can totally be your favorite coffee spot now. What’s your go-to method?
Frequently Asked Questions
Why is making coffee at home a good idea?
Making coffee at home is a great way to save money because you buy beans in bulk and avoid daily cafe prices. Plus, you get to control exactly how your coffee tastes, from the type of beans to how strong you like it. You’re in charge of making sure it’s fresh and tastes just right for you.
What’s the best way to get evenly ground coffee beans?
A simple trick is to gently shake your coffee grinder while it’s running. This helps the beans move around, so they get ground more evenly. This makes your coffee taste smoother and more flavorful.
How can I make frothy milk for my coffee without special tools?
You can easily froth milk by putting it in a jar, shaking it hard for about 30 seconds, and then microwaving it for another 30 seconds. A French press or a simple hand frother also works well to get that creamy, foamy texture.
What’s the right amount of coffee and water for a perfect cup?
A good starting point is a 1:16 ratio, meaning for every 1 gram of coffee, use 16 grams of water. Using a kitchen scale helps you measure this accurately so your coffee is just right every time.
Can I make coffee if I don’t have a coffee maker?
Yes, you definitely can! Methods like the French press or pour-over are perfect for this. With a French press, you steep the grounds in hot water and then press the plunger. For pour-over, you use a filter and funnel to pour hot water over the grounds.
What’s the most important thing for making great coffee at home?
Focus on four key things: the amount of coffee and water (ratio), the water temperature, how fine or coarse the coffee is ground, and using fresh beans. Getting these basics right will make a huge difference in your coffee’s taste.